HOW I DO IT ALL!
Okie dokie, artichoke-y. So many of you guys want to know how I draw my comics. I mean, from start to finish. So this is how I do it, in its complete entirety. If you want to follow the same technique, you'll need:
Paper
2 Colored Pencils (Some light color, preferably light blue and a dark blue.)
Brush pen (or some other way to ink the pic, like a sharpie.)
Scanner
Photoshop (In my pics, I'm using version CS2 on a Mac, but versions as early as 5.5 also work pretty much the same way. They look just a tad different.)
Here we go:
Step 1.Okay, first, I come up with an idea. I plan out what I want the comic to look like, either in my head, or in little sketches. I have all the dialogue worked out beforehand.
Step 2.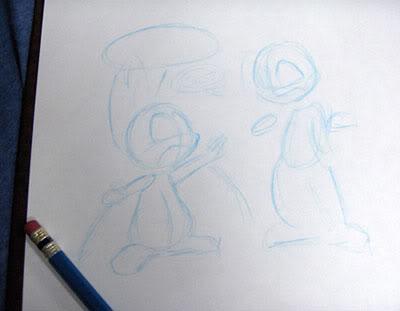
This is the very beginning stages of my comic. I draw out some basic shapes for my characters in a light blue pencil. I'm really loose at this point, and just want to work out body posture, composition, and where the speech bubbles go. If you plan the bubbles early, you won't be trying to cram them somewhere. I'll draw out all the panels like this, usually two or three to a sheet of paper. In this example, it's just a one panel comic thing.
Step 3.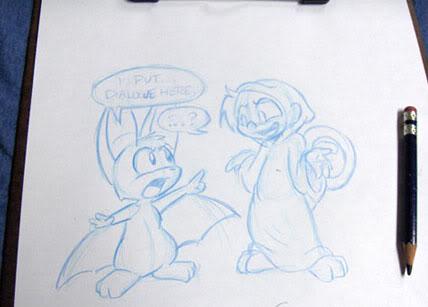
This is the refinement stage. I draw out all the details of my charas in a blue pencil. This includes the words in the bubbles. If the words don't fit well, feel free to make the bubble bigger. I do not use mechanical pencil, because colored lines can easily be removed in Photoshop, and grey pencil lines can't.
Step 4.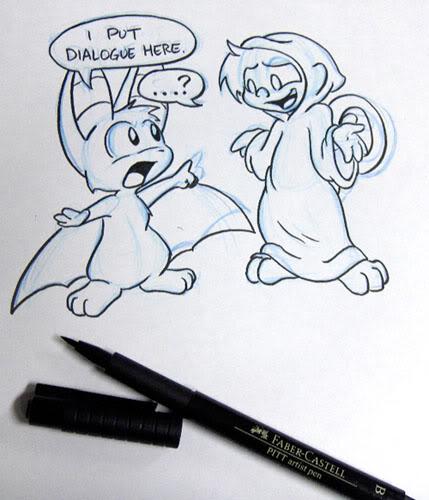
This is the inking stage. I ink all the outlines of the characters, the bubbles, and the text. (I don't do panel borders at this stage, though.) I use a brush pen, which gets that nifty line weight, but feel free to use a sharpie. It works nicely, too. DO NOT erase your colored pencil lines. It's not necessary, we can fix that in Photoshop.

(((((Angie: This is the same pen I used and it is amazing)))))
Step 5.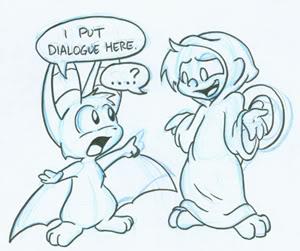
This is the point where I scan the pic. I don't usually mess too much with scanner settings, but I DO change the resolution to 300 dpi. This makes the pictures really, really big, and I'll have to shrink them later, but this way I can color them easily. At this point, the pic looks pretty grubby. It's okay.
Step 6.
Now to Photoshop. The first thing I do is adjust the Layers. I go to Image-Adjust-Levels, or press Ctrl+L. The trick is to move the black triangle to the right until your lineart is nice and black, and move the white triangle to the left until the paper area is white. Don't worry about the color pencil lines yet.
Step 7.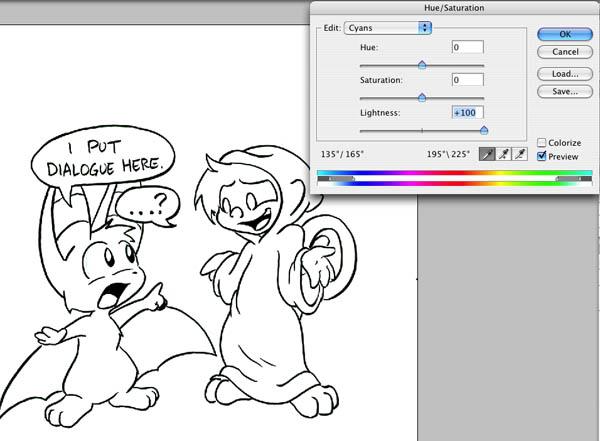
Time to get rid of that color. Go to Image-Adjust-Hue/Saturation, or press Ctrl+U. This brings up a color control panel. Change the dropdown menu from Master to Cyan. Then change the lightness to 100. This will make your blue pencil lines disappear!! If there are still some left, change the menu to Blue, and do the same. If you drew with a green colored pencil, change the menu to Greenā¦ You get the picture. See, isn't that easier than trying to erase those grey pencil lines?
Step 8.I drew a panel border around the pic. Just go to the Marquee tool (that dotted rectangle), and draw a box around your pic. Then go to Edit-Stroke, and choose the width of the box. Click okay, and there's your panel.
Step 9.Okay, this is the most complex step, I suppose. It uses Layers! Gasp! But this is the way to set up your pic for your color. See your Layers window? If not, go to Windows-Layers. Now, click the layer that has your lineart on it. It's probably the background layer. Since the background layer is locked, we need to put our lineart on a new layer. Click the layer, go to Layer-New-Layer via Copy, or press Ctrl+J. That copies your lineart to a new layer. Now you can go to the background layer and erase that lineart. We won't need it. (Click the bg layer, press Ctrl+A, then Delete.)
Okay. Now it should look like this:
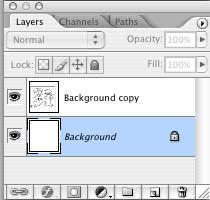
Now, see, that menu right above your layers that says Normal? Yep. We'll tweak that next. Click your lineart layer. Then click that menu. Choose Multiply from the list.
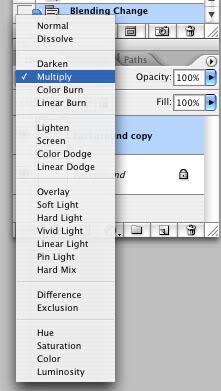
What does that do? Why, the best thing ever! It changes this layer so that layers beneath it will show through. It's kinda' like if you drew your lineart on a piece of clear plastic. Don't understand? Just watch!
Step 10.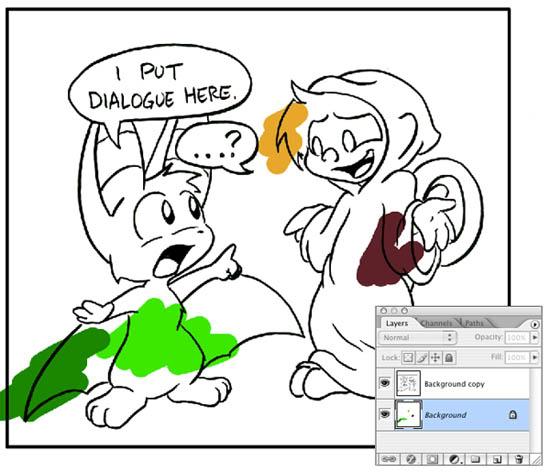
See what happens when I click the background layer and color on it? The colors aren't affected by the lineart! No more nasty white haloes around your lineart! Glee! So you can color to your heart's content on layers under the lineart layer, and your lineart won't be affected! Wheeee!
Step 11.
Here is my final piece. All the charas are colored, and I have a background. (Notice I created a separate layer to work on my backgrounds.) We're almost done.
Step 12.Okay, first make sure you're completely happy with your comic. (Save a separate version, just in case.) Now go to Layers-Flatten Image. This squishes everything to one layer.
And then you're done!
